
I started looking at pictures on vintage apron patterns to get a feel for what style of apron I would make. These three where the main ones that I ended up used for my pattern shape.


I decided to go with a sweetheart neckline and princess seams down the front, with the shoulder straps being part of the centre bodice piece. The back is the same as vintage patterns above, with a button up the top and ties at the waist. I decided not to go for pockets and not to have a ruffle around the edge.
The pattern process was probably a tad over-engineered, but it had been a little while since I'd drafted something from scratch, so it took a bit for my patterning mojo to kick in. Once I was happy with my muslin of the top half, I drafted the skirt and tie pieces.
The cherry print fabric I had was cotton and quite light weight. I was concerned that with frequent use and washing it would tear easily, so I decided to back it with some white cotton duck I had in my stash.
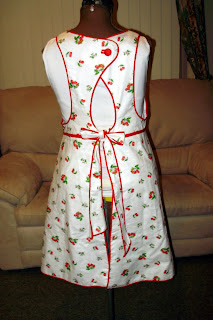
I cut out the pattern pieces in each fabric and then used the overlocker to sew them to each other and finish the raw edges. I then proceeded with the construction of the apron. As the cherry print isn't as bold as the original source of inspiration, I decided that it needed some trim to make it "pop" a bit. I used red bias tape around the edges and across the waist seam.
For the button closure at the back, I decided to use a fabric covered button. I played around with both a cherry print and plain red fabric button and decided the plain red button looked better. The button hole is bound with red bias tape to match the edging.And here is the finished product, as modelled on Daphne:
And here it is modelled by yours truly*
*I should note that I am not in fact naked under the apron. I was modelling my newly acquired vintage bathing suit when I realised that I hadn't taken any photos of me in the apron, so I quickly threw it on and took a few shots (I couldn't be bothered getting into a frock). I realised later that it looks like I'm only wearing an apron. Think of it as an apron pin-up if you like :)


No comments:
Post a Comment