 Well, it's finally happened. I've done some actual sewing! Today I went to the second class (of three) for the Screen Siren 1960s Frock. The first class was mostly spent cutting out the pattern and fabric, transferring markings etc.. And yes that took 3 hours. It's the most tedious part of sewing for me.
Anyway, today involved actual sewing. I'm glad now that I'm doing this dress as part of a class where I can ask questions and get someone to check what I'm doing. I had read the instructions that came with the pattern. Some bits were fine, others left me baffled. The diagrams didn't help. It was great to have someone demonstrate the various steps. Made it a lot more obvious.
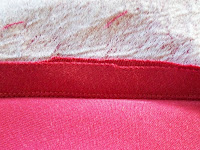
My progress today was to attach the linings to the main body pieces and understitching them. I had heard the term understitching before, but didn't really know what it meant. This was one of those things I think the pattern company assumed you already knew. Turns out it is a way of making sure the lining doesn't roll over to the front of the garment. Basically you sew your lining and main piece together as normal. Then fold/press the seam over to the lining side. You then sew really close and parallel to the seam line on the lining side of the seam. It looks like this (there are two rows of stitching there, the seam line is right in the crease):
Then once you flip your fabric so that the right sides are on the outside and the seam on the inside it looks like this (front & back, where you can just make out the stitch line) and gives you a nice strong and smooth edge. Really does stop the lining from rolling over to the front and still looks quite neat on the inside.
I'm generally happy with my progress today. I managed to attach all the linings without much unpicking. Apparently before next class we need to have the back skirt slit done as well, so I have a little bit of homework.
These are the front and back pieces so far. The darts are just pinned at the moment (and those are my tailor's tacks looking all wiggly there)
I'm not happy with how the shoulder gathers are sitting on the front piece, especially the left shoulder (right in the photos). I tried doing a normal gather, but didn't like the uneven result, so decided to just fold a few pleats in. However, I think the angle of the pleats now doesn't match the angle of the neckline and that's making it look a bit wrong. Easy enough fix though as the shoulder pieces are still open. I am really happy with how the lining of the front piece is looking. Nice and clean.
Next Sunday we pin all the pieces together and do a fitting before sewing it up and adding the zipper in the back. I think this is the part I'm most worried about. I have a long history of making beautifully finished garments that fit dreadfully. And I hate that sinking feeling when you pin something together and put it on and realise immediately that it doesn't fit. In my case, it is usually too tight which is so much harder to fix than too loose. And I'm making the sheath dress version of this pattern, which is very fitted. The only alteration I've done so far has been to shorten the waist. I help the pattern piece against me and folded it up until the "waist" line was sitting at my waist. Took at least an inch of the original pattern. Hopefully this means the curves will be in the right places. The pattern has four pairs of vertical darts. I'm hoping that between the side sides, back seam and the eight darts, I should be able to get a good close fit. *fingers crossed*
I'm also apprehensive about zippers. The last time I remember putting a zipper in was my Year 8 sewing class in high school. I remember I got good comments on my zipper, but my brain has long since erased the know-how of zipper insertions. I will be grateful for having some help and advice on hand.
The best thing about today was realising that I haven't forgotten all my sewing know-how and can actually do this. I think it was good to have someone there to provide some guidance like where to start, and demonstrate some techniques and just check that we're doing things in the right order. It's a bit like sewing with a safety-net.


No comments:
Post a Comment