Tuesday, February 15, 2011

Screen Siren 1960s Frock - Finished Dress


It's finished! I have a dress! Despite knowing that there is plenty of past evidence to support that I can in fact sew, I had lost confidence in my abilities. I am happy to say I have now regained my sewing mojo. Last Sunday was the last class in this project at Thread Den. It was the dreaded fitting and zipper and class. I'm pleased to say it all went fairly smoothly.

We did the shoulder seams, which I'm glad were explained as they were done differently to how I thought they were done. Then it was time to pin the side seams and put it on to check fit. The first good sign was that I could get it on over my clothes. The instructor was great in helping with the fitting. I'd forgotten how useful an extra person is for this stage. She let it out a bit at the hips (which I expected would need a bit more room), took it in little under the arms, and adjusted the darts to fit better around the bust and to move slightly higher on the back (probably a result of having taken an inch out of the length at the waist). Side sides and darts sewn up, it was time for the dreaded zipper.

Okay, turns out zippers are not anywhere near as complicated as I thought. This was a regular zipper, machine sewn in. No funky invisible zips, or lapped thingies. It was a simple case of pressing the fabric back at the sewn allowance, then lining the zipper up so the pressed edge of the fabric just covered the teeth, pinning it in, then machine sewing about 3/8" from the edge. Too easy! The only slight hiccup was that somewhere in my pinning and sewing, the zipper must have moved a bit and the top of the back pieces don't line up evenly. Could also be an error in my cutting out the back pieces.

I finished up the class with the final fitting checked and the hem pinned and only the hand sewing parts left to do (shoulder seams, hem, and hook & eye above the zipper). Once I got home, I decided I wanted to get the dress finished. I did the hand sewing in front of the TV after dinner. I must admit it took me a bit longer than I expected. I've clearly lost my previous hemming speed. And as is the Murphy's Law of sewing, the last thing you need to do gives you the most grief (the other law is that you will run out of thread an inch before the end). In this case, the damn hook and eye above the zipper was being difficult. I was tired by this point and losing my dexterity. I found it tricky to hold the little hook & eye bits in place and then sew them in. Then I sewed the hook in around the wrong way. Argh! But I got it done eventually. The top of the back pieces still isn't sitting great, but it's passable.

And now the photos! Please pardon the unpressed hem, the tired expression and the poor lighting. I will try to take some "dressed up" photos that better showcase the dress. Update: Here it is, all finished and out at Circa Nocturna. The black belt is from another frock. I felt it needed a belt. The flower is a brooch that just happened to match the fabric really well.
 I'm pretty happy with how it turned out. Definitely has that "Joan Holloway" wiggle dress look to it. I'd like to try the full skirted version of this pattern as well.

I think we can safely say that my sewing mojo has returned. Bring on the frocks!

Sunday, February 6, 2011

Screen Siren 1960s Frock - Sewing with a safety net

Well, it's finally happened. I've done some actual sewing! Today I went to the second class (of three) for the Screen Siren 1960s Frock. The first class was mostly spent cutting out the pattern and fabric, transferring markings etc.. And yes that took 3 hours. It's the most tedious part of sewing for me.

Anyway, today involved actual sewing. I'm glad now that I'm doing this dress as part of a class where I can ask questions and get someone to check what I'm doing. I had read the instructions that came with the pattern. Some bits were fine, others left me baffled. The diagrams didn't help. It was great to have someone demonstrate the various steps. Made it a lot more obvious.

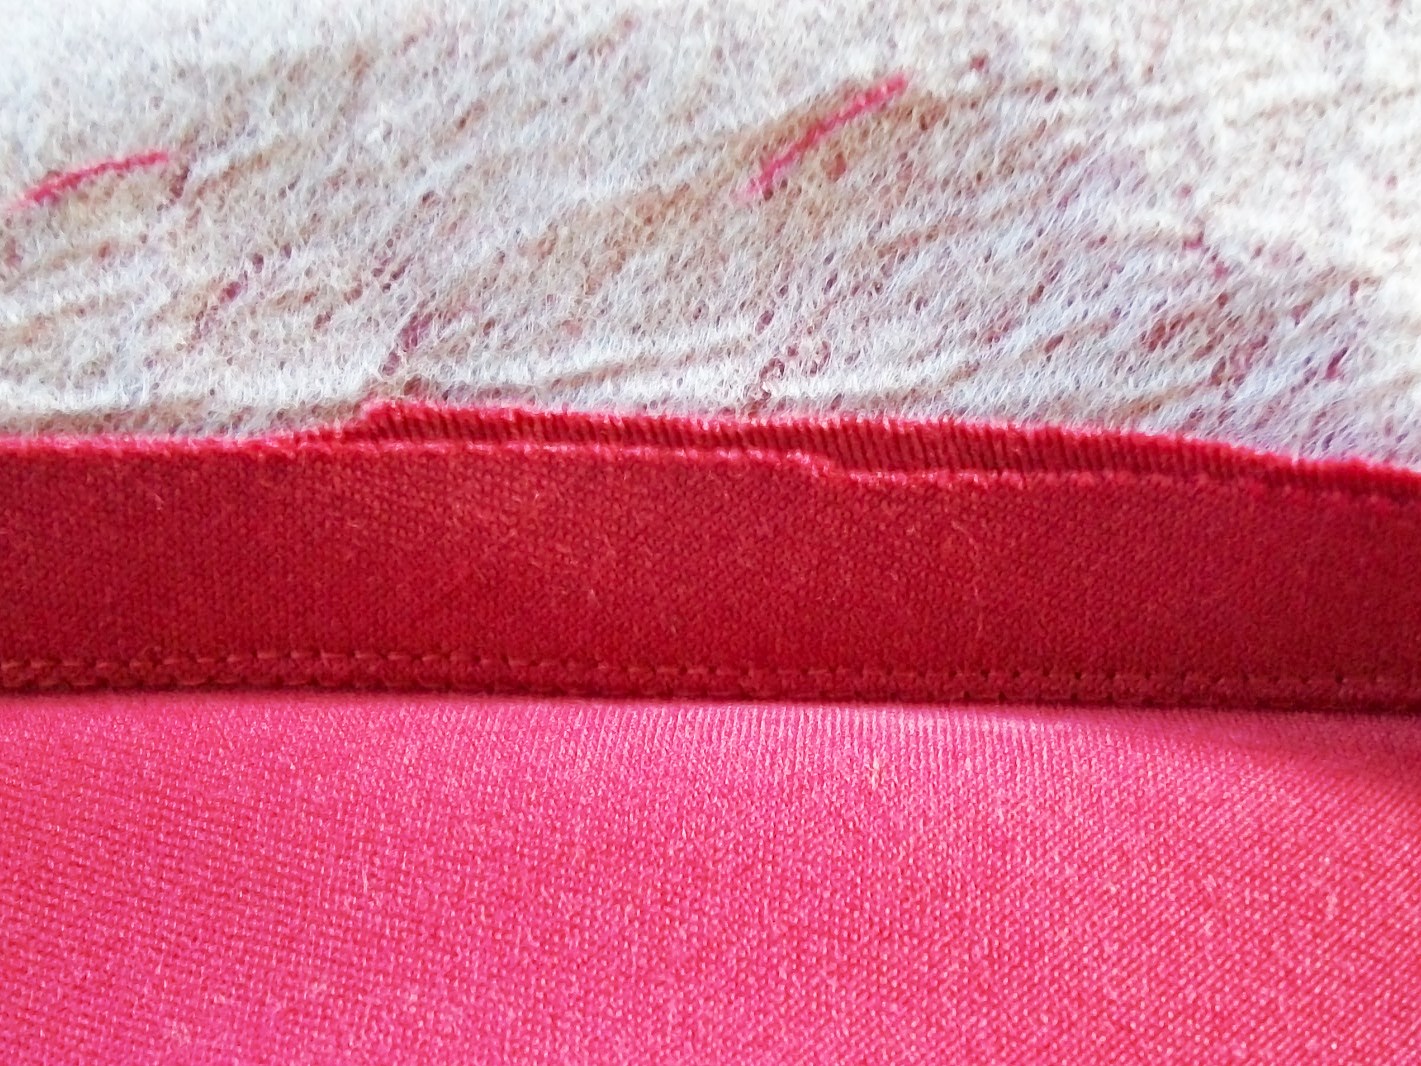
My progress today was to attach the linings to the main body pieces and understitching them. I had heard the term understitching before, but didn't really know what it meant. This was one of those things I think the pattern company assumed you already knew. Turns out it is a way of making sure the lining doesn't roll over to the front of the garment. Basically you sew your lining and main piece together as normal. Then fold/press the seam over to the lining side. You then sew really close and parallel to the seam line on the lining side of the seam. It looks like this (there are two rows of stitching there, the seam line is right in the crease):
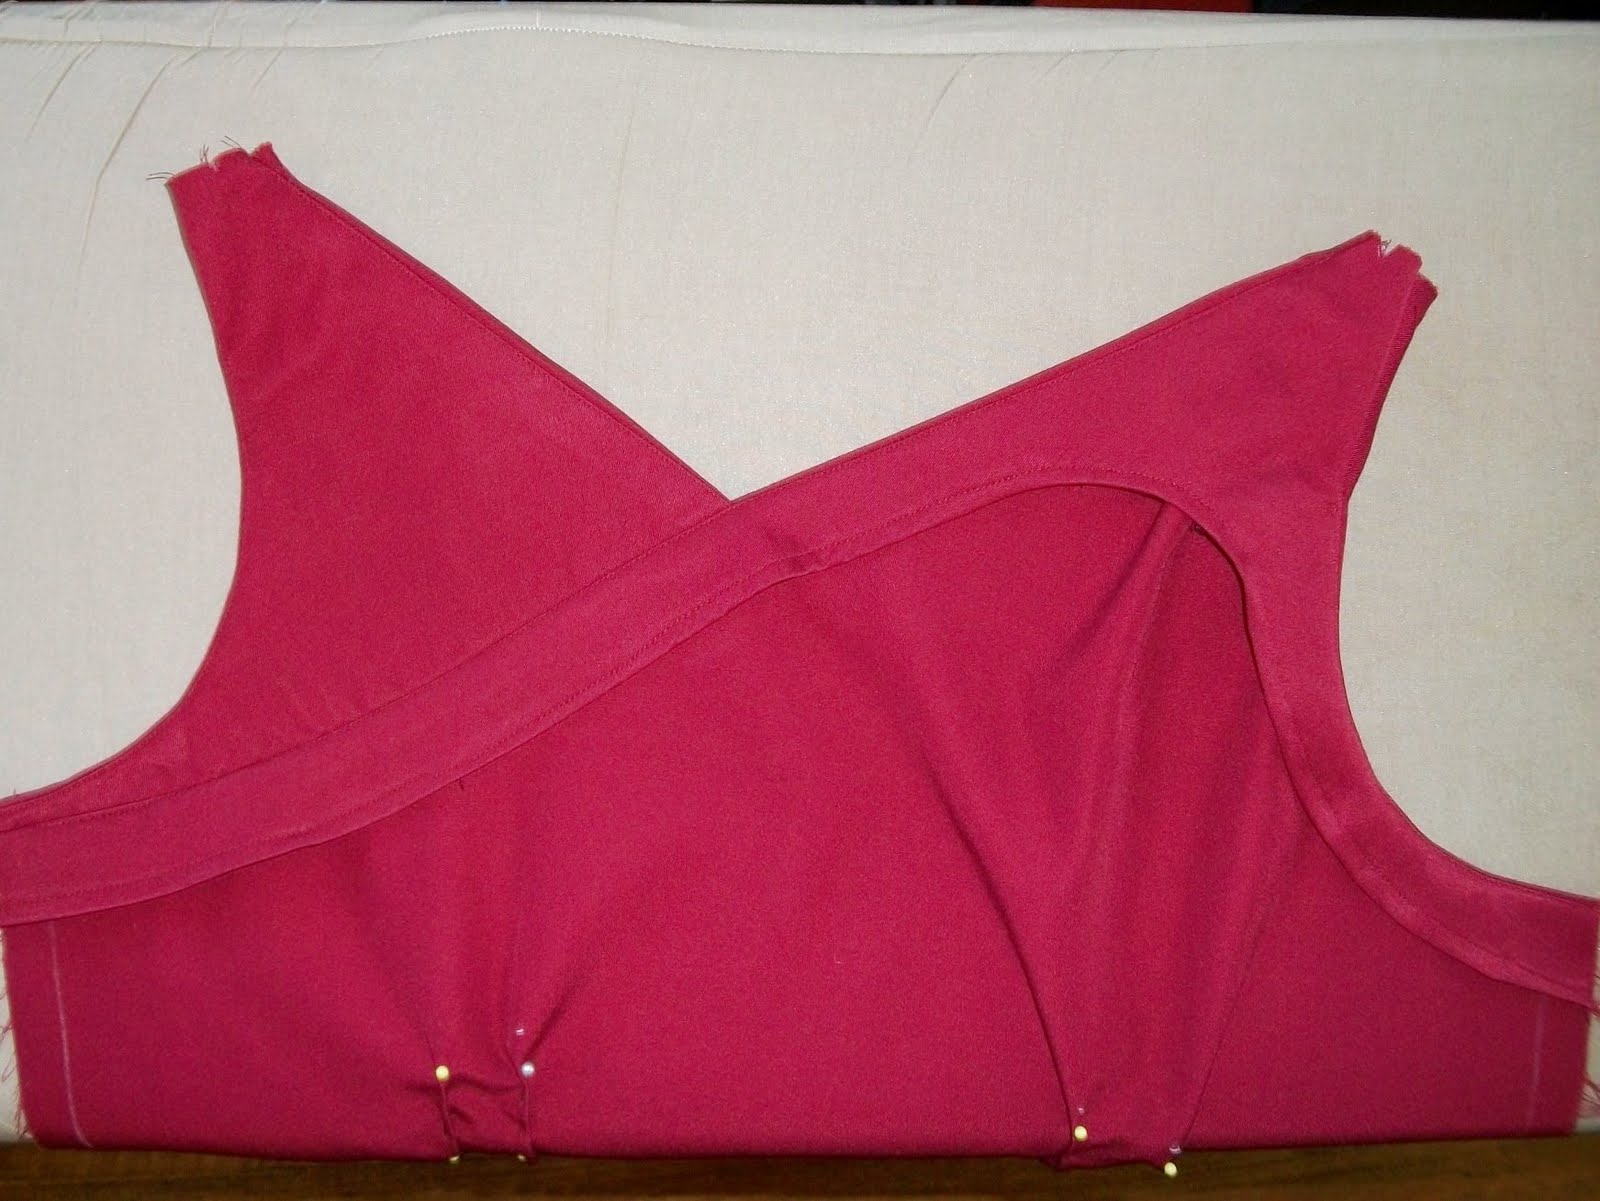
Then once you flip your fabric so that the right sides are on the outside and the seam on the inside it looks like this (front & back, where you can just make out the stitch line) and gives you a nice strong and smooth edge. Really does stop the lining from rolling over to the front and still looks quite neat on the inside.

I'm generally happy with my progress today. I managed to attach all the linings without much unpicking. Apparently before next class we need to have the back skirt slit done as well, so I have a little bit of homework.

These are the front and back pieces so far. The darts are just pinned at the moment (and those are my tailor's tacks looking all wiggly there)

I'm not happy with how the shoulder gathers are sitting on the front piece, especially the left shoulder (right in the photos). I tried doing a normal gather, but didn't like the uneven result, so decided to just fold a few pleats in. However, I think the angle of the pleats now doesn't match the angle of the neckline and that's making it look a bit wrong. Easy enough fix though as the shoulder pieces are still open. I am really happy with how the lining of the front piece is looking. Nice and clean.


Next Sunday we pin all the pieces together and do a fitting before sewing it up and adding the zipper in the back. I think this is the part I'm most worried about. I have a long history of making beautifully finished garments that fit dreadfully. And I hate that sinking feeling when you pin something together and put it on and realise immediately that it doesn't fit. In my case, it is usually too tight which is so much harder to fix than too loose. And I'm making the sheath dress version of this pattern, which is very fitted. The only alteration I've done so far has been to shorten the waist. I help the pattern piece against me and folded it up until the "waist" line was sitting at my waist. Took at least an inch of the original pattern. Hopefully this means the curves will be in the right places. The pattern has four pairs of vertical darts. I'm hoping that between the side sides, back seam and the eight darts, I should be able to get a good close fit. *fingers crossed*

I'm also apprehensive about zippers. The last time I remember putting a zipper in was my Year 8 sewing class in high school. I remember I got good comments on my zipper, but my brain has long since erased the know-how of zipper insertions. I will be grateful for having some help and advice on hand.

The best thing about today was realising that I haven't forgotten all my sewing know-how and can actually do this. I think it was good to have someone there to provide some guidance like where to start, and demonstrate some techniques and just check that we're doing things in the right order. It's a bit like sewing with a safety-net.

Sunday, January 23, 2011

Sew-along lack of progress, but a new project in the wings


I confess I'm not making much progress on the Crepe Sew-Along project. I have made it as far as tracing my size from the pattern onto vilene and cutting those out (photographic evidence below). I'd forgotten that the leaning, tracing, and cutting really flares my lower back, even when I paced it out into short periods. It's kind of put me off doing the next step of tracing the pattern out onto the muslin. I may perhaps need to enlist the help of the Cunning Plans Dept to do the tracing and cutting. Then I can get to some actual piecing together and fitting, which will lead to actual sewing.


In the meantime, I've signed up for another project. Towards the end of last year I decided to buy myself a Christmas present and signed up to a Vintage Style Swimsuit class, run by Thread Den. I thought it would be an excellent way to kick me in to some sewing if I had to turn up to actual classes. And I've not really sewn with stretch fabric much, or even attempted swimwear, so I thought it would be a good challenge.

Imagine my dismay when I was phoned a few days before the class to be advised that unfortunately they didn't have enough numbers for the class to run. Not to be dissuaded from my plan to use classes to kick my sewing butt in gear, I have picked another class - Screen Siren 1960's Frock - which uses this Butterick pattern B6582.

I ordered the pattern online last week and hopefully it will arrive this week before the class starts on Sunday. I also need to buy fabric. I'm undecided on which version to do. Do I go for the full-skirted version in a light, summery fabric? Or the sheath dress in a darker, evening tone? I'm tempted to go for the sheath dress as that will require more fitting and I'll be grateful to have someone on hand to help with that. I can always make the full-skirted version after the class. I think I shall have to have a little expedition to the Brunswick fabric shops to see what jumps out and grabs me.

In other news, my boss gave me The Secret Lives of Dresses by Erin McKean when I saw her the other day. She picked it up because she thought it would be the sort of book I'd like. I then realised that it is written by Erin from A Dress a Day, who I've been following for a couple of years now. I just finished reading it this afternoon and loved it. A beautiful story, I recommend it to anyone with a deep, heart-felt passion for the clothes of yesteryear.

Friday, November 19, 2010

Summer Sewing Inspiration: Joining the Crepe Sew-Along

Thanks to getting into a good physical rehabilitation program, I'm now starting to feel like I can tackle some proper sewing. I've been thinking about what summer sewing projects to kick off with and faced the usual problem of too many pattern choices.

Then I saw that the lovely Gertie will shortly be starting another sew-along, and with a nice simple wrap dress, which is a) perfect for me to get back into sewing with and b) perfect for expanding my summer wardrobe.

The sew-along introduction post is here and the pattern is Colette Crepe:

I've ordered my pattern (and you can get a 20% discount code from Gertie's blog if you're interested) and it is currently en route to my post box.

Having cleared out my fabric stash prior to moving, it was necessary to do some fabric shopping. I recently cruised the local Brunswick fabric stores. I came away with two fabrics, both of which I think would suit this pattern, but are quite different so I'm undecided which to use.


This one is black with tiny polka dot and larger, irregularly placed dots.


This one is a pale, olivey green with a printed black pattern. The print feels a little raised on one side.

Both are cotton/cotton blend I think and are mostly opaque. I'd probably wear a slip under the pale one though. At the moment, I think I'm leaning towards the black and white, because that's my favourite colour palette and I could see it working well as an autumn transition dress worn over a long sleeve black top and with tights and boots. However, I really lack some lighter (in both colour and weight) dresses and I think summer here is going to be pretty toasty.

Decisions, decisions. I have until 6 December to make up my mind and start sewing. Suggestions welcome :)

Friday, October 8, 2010

iPhone

I have one :) I can blog from it. Mobile blogging here I come.

Sunday, September 26, 2010

Late 1940's black jacket

This is one of two gorgeous jackets I picked up at the Love Vintage fair earlier this year. The fabric is a black worsted wool. The collar and cuffs have this lovely pin tuck treatment that makes the jacket this much more distinctive.

Here it is, and pardon the less than enthused expression on my face, I was doing these after faffing about doing the swimsuit shots so was getting tired.
I think the shot from the back best shows just how nipped in the waist is. The construction of the jacket is beautiful. It is a joy to wear such a well tailored garment. As I commented to a friend, it feels a bit like being hugged all day, it fits that snugly around the waist.

And onto the detailed shots for the sewists out there who love to see how things are put together.
The label - mornessa. I haven't been able to uncover much about this label on the internet so I doubt it was a high fashion label. It's made in England so I'm guessing the brand is also British. Next to it is the tag from the stall I bought it from, which gives the rough date and size. And the very reasonable price, considering what I've paid in the past for suit jackets from DJs or similar that have not been any where near as well made.
The lovely pin tuck feature on the collar and the cuffs. It's the same fabric as the rest of the jacket, just with gorgeous rows of pin tucks.

Fabric covered buttons and bound button holes.

The shape of the back and sleeve pieces is interesting. It's a bit tricky to show the seam in the photos, but the centre back piece and the top of the sleeve are all one piece, rather than a separate back piece and set in sleeve. I haven't seem this style of pattern in a jacket before.

Also in the shaping, the nipped in waist is very obvious in the side seam. And even the sleeves have darts in the them to add to the very fitted style. The jacket has two vertical pockets at the front, with a little flap that sits perfectly flat with the jacket.

I *love* this jacket. I've worn it to work a number of times and always get compliments on how beautifully it fits. I'm on the look out for any patterns from that era that are close to this, and particularly have that interesting centre back and sleeve piece as I'm curious as to how that affects the way you construct and fit the garment.

Monday, September 13, 2010

Vintage-inspired Cherry Print Apron

A while ago I was inspired to make a vintage style cherry print apron. It started when I saw this apron in a magazine and also came across some vintage cherry print fabric at a market.
I started looking at pictures on vintage apron patterns to get a feel for what style of apron I would make. These three where the main ones that I ended up used for my pattern shape.


I decided to go with a sweetheart neckline and princess seams down the front, with the shoulder straps being part of the centre bodice piece. The back is the same as vintage patterns above, with a button up the top and ties at the waist. I decided not to go for pockets and not to have a ruffle around the edge.

The pattern process was probably a tad over-engineered, but it had been a little while since I'd drafted something from scratch, so it took a bit for my patterning mojo to kick in. Once I was happy with my muslin of the top half, I drafted the skirt and tie pieces.

The cherry print fabric I had was cotton and quite light weight. I was concerned that with frequent use and washing it would tear easily, so I decided to back it with some white cotton duck I had in my stash.

I cut out the pattern pieces in each fabric and then used the overlocker to sew them to each other and finish the raw edges. I then proceeded with the construction of the apron. As the cherry print isn't as bold as the original source of inspiration, I decided that it needed some trim to make it "pop" a bit. I used red bias tape around the edges and across the waist seam.

For the button closure at the back, I decided to use a fabric covered button. I played around with both a cherry print and plain red fabric button and decided the plain red button looked better. The button hole is bound with red bias tape to match the edging.
And here is the finished product, as modelled on Daphne:

And here it is modelled by yours truly*

*I should note that I am not in fact naked under the apron. I was modelling my newly acquired vintage bathing suit when I realised that I hadn't taken any photos of me in the apron, so I quickly threw it on and took a few shots (I couldn't be bothered getting into a frock). I realised later that it looks like I'm only wearing an apron. Think of it as an apron pin-up if you like :)

Sunday, September 12, 2010

Catch up posts!

I had a lovely day out at another Lindy Charm School for Girls workshop today, this time in Melbourne with the fabulous Ms Belle as my companion in charm. It reminded me that I haven't actually gotten around to doing a number of vintage blog posts! I'd finally gotten around to taking some photos, and have talked about them with friends, but had forgotten to actually post.

So shortly I will post about:
  • The completed cherry print apron (which I wore over my frock tonight while making lamb roast post-charm school)
  • The two gorgeous late 1940's suit jackets I picked up at the Love Vintage Fair earlier this year.
  • The fabulous vintage (1950s?) swimsuit I bought from a friend recently that fits beautifully and has interesting construction.
  • A vintage frock from bought from the same friend as the swimsuit that is lovely, but a little big and I'm debating to alter or not to alter.
Stay tuned.

Friday, August 27, 2010

Minimalism and thriftiness - partners in lean living

In the lead up to the great leap south, I took to a very minimalist living philosophy. Aside from the therapeutic affects of a good cull of "stuff", it also meant there was much less to pack. It's also re-affirmed a desire to live free of unnecessary clutter. I've enjoyed posts from The Everyday Minimalist, though she's far more minimalist than me!

The other thing that I've taken to a further extreme than usual lately is being thrifty. I've always been a firm believer in living within your means. At the moment, we're in the rather annoying position of having to pay both mortgage and rent while we wait for the house to sell. Add to this mix the fact that I've changed work from regular salary to consulting and invoicing so our income is a little wacky. As soon as the house sells, we'll be back on very good financial footing, but until then we're keeping a tight reign on things.

First things first, all discretionary spending is either on hold or significantly reduced. Getting back to the minimalist philosophy, everything comes down to whether we really NEED something. If it isn't essential, we don't buy it. In the majority of cases, it will still be there later when the budget is more healthy.

Now everyone varies in what they consider necessary or discretionary spending. Something that is very definitely in our necessary category is health care, which in my case is expensive. By cutting out as much discretionary spending as possible, I can do everything I need to do to keep me healthy without feeling any guilt for blowing the budget.

Next, we've changed the way we use the credit cards. Normally we pay the credit card off in full each month. This is great as it means no interest charges. Now though, it actually makes more sense to pay the minimum and incur the interest instead of pay it in full. We won't end up that much out of pocket from the interest by the time we're back to being able to pay it in full. We already use the credit card as much as possible. Partly for the Frequent Flyer points, but also because it's easier to track where our spending is going.

I've always enjoyed thrifty shopping. I've been making use of websites like Gumtree to source things cheaply. We managed to get a second-hand desk and office chair for the home office so the CPD could work from home relatively cheaply. Our thrifty gardening adventures are over at Greening Our Life. I think the trick is to only buy what you need and not get sucked into something that is a bargain, but isn't essential.

I'm enjoying the challenge at the moment, though I'll admit the list of "things to buy once the house sells" is starting to get long!

Tuesday, August 3, 2010

Bonjour Brunswick!

We're here! The move from Figtree to Brunswick went very smoothly, though as the Cunning Plans Dept commented, what would you expect with two project managers running the show :)

We headed off on Thursday morning, stopping a number of times along the way to swap drivers and give the dogs a stretch and toilet break. After having gone to the effort to get sedatives from the vet, I then managed to misplace them in the packing madness on Wednesday and couldn't find them. As it turned out the dogs were fine (except for the bit where they ate a bag of blood & bone that was in Mum & Dad's garden shed). Hudson was only car sick once. Otherwise they handled the drive pretty well. We arrived in Brunswick around 8:45pm and stayed at a friend's place around the corner from our new digs.

Friday was moving in day and it also went pretty smoothly. The new fridge I'd ordered a couple of weeks ago arrived with impeccable timing on Friday morning, followed by the removalists and the electricity guy, so it was all systems go! Basically I stationed myself in the kitchen by the front door and the CPD was on dog/shed duty and we just directed the removalists where to put things.

By Friday night we'd unpacked the essentials and had our first meal (granted it was Indian home delivery) with the wonderful Dr Krys. Saturday saw some grocery shopping, more unpacking and a visit from Sam & Belle, who introduced us to Apple Cakes, which are apparently a very Victorian treat (they are effectively an individual size apple pie, dome side up, which is coated in a thick layer of icing). Sunday the unpacking continued with a quick diversion out to CERES to meet Dr Krys for lunch after her Sunday radio show. We had hoped to make use of the famous Melbourne public transport system, only to be thwarted by the fact that the 503 bus does not run on Sundays. At all. Which is a bit lame if you ask me. More unpacking, then a lovely dinner with Miss Bethany (home delivery again).

Monday was back to work for both myself and the CPD. I'd managed to set up enough of the new home office to be functional. Ironically, the first main work task for the CPD in our new location was to fly to Sydney for a meeting. It will be interesting to see how we settle in to having both of us working from home. We are definitely going to have to acquire another desk.

There are still a few boxes left to unpack, but we're mostly moved in. The new place has the footprint of one floor of our old place, so we've downsized a reasonable amount. Thank goodness we were fairly ruthless with the cull before moving. The new house has pretty good storage options. Both bedrooms have large floor-to-ceiling built in wardrobes (and the ceilings are tall, so that's extra space). The kitchen has amazing storage space. I am in serious kitchen storage heaven. I've unpacked all the kitchen items and I still have an empty drawer and a few empty shelves.

More tales of settling into Melbourne to come. So far, c'est magnifique!