Showing posts with label Vintage. Show all posts

Tuesday, February 21, 2012

Slight sidetrack...Ooh la la Pin Up Sew-Along

I know I'm meant to be focusing on the bridesmaid frock right now, but I just stumbled across this fabulous new sew along courtesty of two fabulous bloggers: A Few Threads Loose and Ohhh Lulu.
It's a sew along that includes two absolutely gorgeous vintage French lingerie items, a garter belt and a corsolet bra. I'm seriously tempted to get in on this as the garter belt in particular looks divine. The patterns are by Anna Depew and you can see both these and many more of her lovely patterns at her Etsy store - Mrs. Depew Vintage.
Pattern from Mrs. Depew Vintage

For information about the sew-along and a give away (if you're really quick!), check out A Few Threads Loose and Ohhh Lulu.

Wednesday, February 8, 2012

Butterick B6582: Full Skirted Floral Frock

 A while ago I saw this gorgeous Jerry Gilden dress on Couture Allure:

While this particular dress was beyond my reach, I put it in my inspiration file. A little later I came across this fabric and immediately thought of the dress. 

I wanted to make a similar style dress and was keeping my eye out for suitable patterns. Then I realised I had an excellent candidate already in my stash. Remember Butterick B6582? I made the straight skirted "screen sirens" version last year. The pattern includes a full skirted version as well. 

Since I'm already familiar with the pattern and the bodice fit quite well with minimal alterations, it seems a good choice for my next frock project. After the Crepe dress that needed so many muslin changes and the fabric that was a nightmare to work with, I'm looking forward to something a bit more straightforward.

And I have strong motivation to make this dress. My best friend is getting married in May and I will be her maid of honour. It's a nice simple ceremony so I've been spared the usual horror of bridal party wear. I'd like to have a new dress to wear and having a rough idea of what the bride will be wearing, I think a full skirted vintage style frock would be quite appropriate. And it will give me a chance to finally have something I can wear my very frilly petticoat with.

Friday, September 30, 2011

Buy Nothing New Month - October 2011


I've submitted my pledge to Buy Nothing New for the month of October 2011. As you probably have gathered from this blog and my sustainable living blog over at Greening Our Life, not buying new things is a regular part of how I live. However, even though I think I'll find it easy to go without buying anything new for a month, I'm keen to encourage other people to give it go.

What exactly do you mean by Buy Nothing New?
Buy Nothing New month means that for one month (October 2011), with the exception of essentials* (food, drink, medications, hygiene products) you can beg, borrow, barter, swap or buy secondhand whatever you need. You just buy nothing new.
*I'm still out on whether I'd count buying supplies to make/repair things as "new". E.g. buying a new zipper to replace a broken one on a skirt, buying matching thread to fix a seam etc.. As much as possible I'm going to try and use things from my stash.

Why have a Buy Nothing New month?
Buy Nothing New is not about going without, nor is it Buy Nothing New Never.

It’s about taking October to reassess what we really need, think about where the stuff we buy comes from (finite resources), where it goes (landfill), and what our alternatives are.

It is about conscientious consumption and by not spending on stuff we don’t need, increasing our savings for the things we do need.
Pledge to Buy Nothing New during October and challenge over consumption.  
http://www.buynothingnew.com.au/why/

One of my biggest complaints about modern society is how much people are obsessed with having "stuff", especially cheap stuff. I cringe every time I go past yet another discount store selling crap mass produced from unsustainable materials using underpaid and undervalued labour.

A large part of my love of vintage clothing is that it came from a time when people valued quality of materials and workmanship. I have several beautiful suit jackets from the late 1940s that are far finer in the quality of the materials (pure worsted wool) and the workmanship. The tailoring is neat and well finished. No sloppy stitching and weak seams. They've lasted far better than anything I've ever bought new from a modern department store, including brands that are supposedly good quality.

Vintage to me also harks back to a time of "make do and mend". Clothes and other items were well cared for so they would last longer and mended when necessary to keep them usable. Modern society is very much a disposable society. Fashion moves so fast that clothes are considered out of date within months and the rapid turnover and desire for ever cheaper fashion has driven manufacturers towards the lowest cost materials and labour. While it may be great for some that they can get jeans for $10 from Kmart, the hidden costs are those born by those who labour in poor conditions, who are made sick from industrial pollution from the materials manufacturing process, and countries that exploit their own people to gain Western investment.

Things to think about
  • How many times have you bought a piece of clothing only to have it languish in the back of the wardrobe unworn? 
  • How many times have you succumbed to buying clothes because they were "such a bargain" only to have them fall to bits within a year? 
  • How many times have you thrown out a piece of clothing because it lost a button, broke a zip, had a stain, or had a seam pop?
I know in my lifetime I've been guilty of all of the above at some point. However, a few years ago I decided to make a conscious effort to put more thought into the clothes I buy. I look for quality rather than the cheapest option. I look for ethically and sustainably produced clothing. I look for locally made clothing. I'm prepared to pay more for better quality materials, good working conditions, and a fair wage for labour. I select clothing with consideration for how much use I will get from it. I am less inclined to buy clothing for a "one off" event. I take care when laundering my clothes to make sure I get longer wear from them. I alter and mend my clothes to keep them in my wardrobe for longer. Any clothes I no longer wear are donated to charity if they are in reasonable condition, or go into my refashion/fabric scraps box to be recycled into other things. Rarely does anything go into the rubbish.

Over the years I've acquired some of my favourite wardrobe pieces from non-new sources such as:
In a city like Melbourne, we really are spoilt for choice when it comes to second-hand or vintage clothing sources. Not only is buying second-hand more sustainable, it's also often less expensive which is great for the budget conscious.

As we go through October, I'll be posting what things I've sourced from non-new sources, as well as sharing some of my favourite ways to buy nothing new.

I encourage everyone to give Buy Nothing New month a go. It's just one month. When you go to buy something new, take a moment to pause and think:
  • Do I really need this?
  • Does it need to be new?
  • Is there another option to get this second-hand?

Sunday, February 6, 2011

Screen Siren 1960s Frock - Sewing with a safety net

Well, it's finally happened. I've done some actual sewing! Today I went to the second class (of three) for the Screen Siren 1960s Frock. The first class was mostly spent cutting out the pattern and fabric, transferring markings etc.. And yes that took 3 hours. It's the most tedious part of sewing for me.
Anyway, today involved actual sewing. I'm glad now that I'm doing this dress as part of a class where I can ask questions and get someone to check what I'm doing. I had read the instructions that came with the pattern. Some bits were fine, others left me baffled. The diagrams didn't help. It was great to have someone demonstrate the various steps. Made it a lot more obvious.

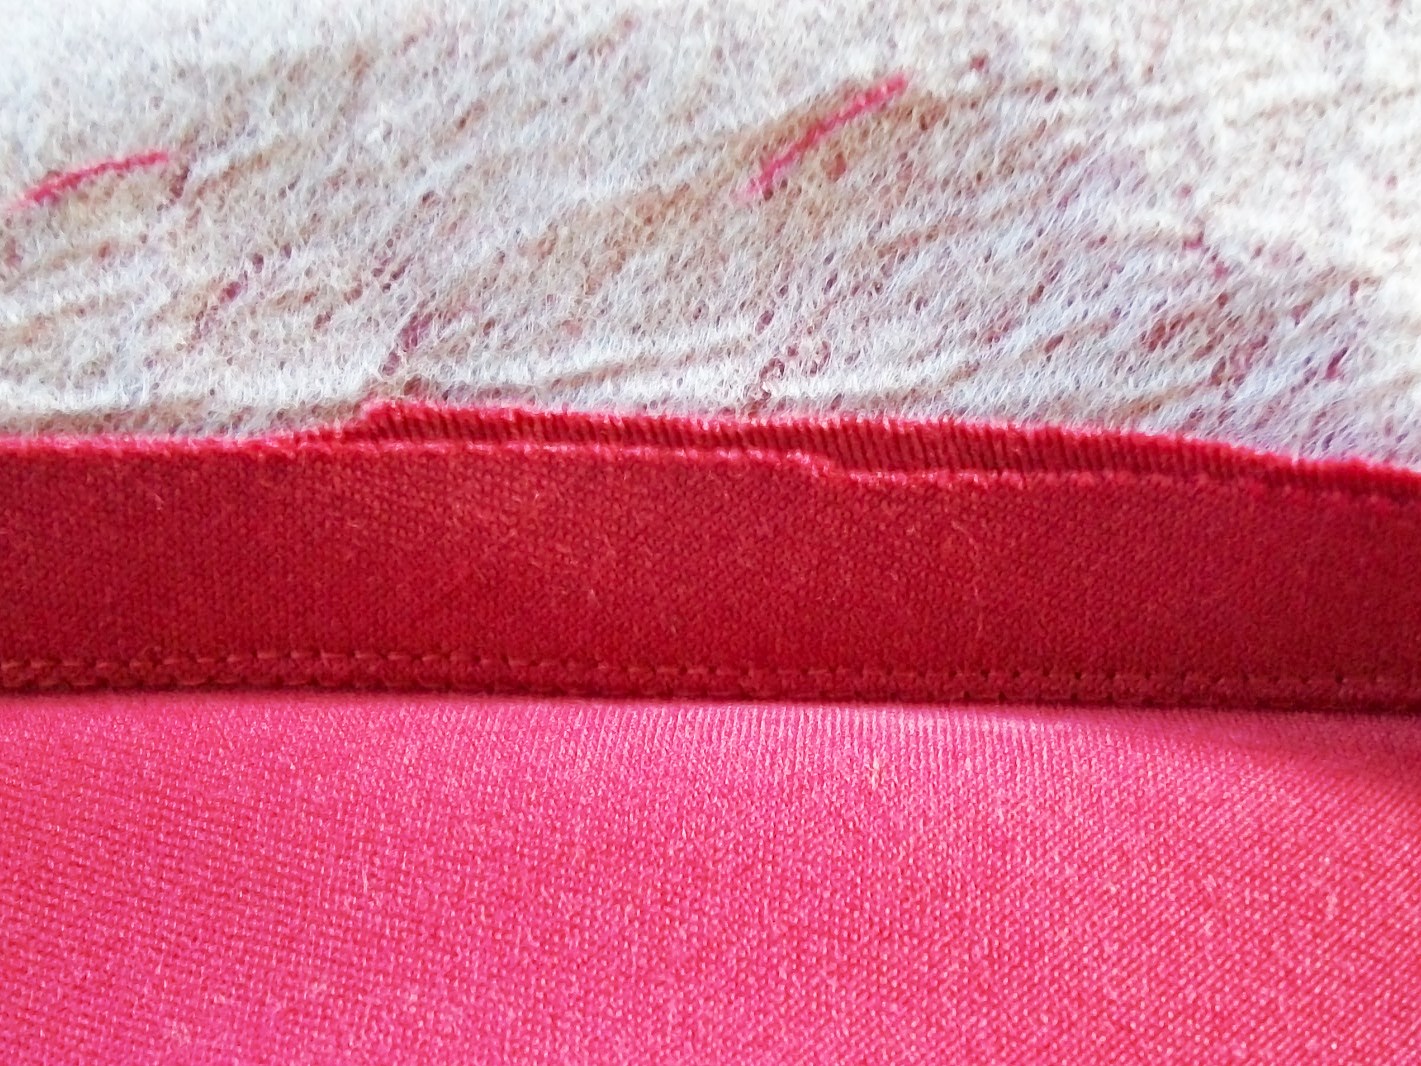
My progress today was to attach the linings to the main body pieces and understitching them. I had heard the term understitching before, but didn't really know what it meant. This was one of those things I think the pattern company assumed you already knew. Turns out it is a way of making sure the lining doesn't roll over to the front of the garment. Basically you sew your lining and main piece together as normal. Then fold/press the seam over to the lining side. You then sew really close and parallel to the seam line on the lining side of the seam. It looks like this (there are two rows of stitching there, the seam line is right in the crease):
Then once you flip your fabric so that the right sides are on the outside and the seam on the inside it looks like this (front & back, where you can just make out the stitch line) and gives you a nice strong and smooth edge. Really does stop the lining from rolling over to the front and still looks quite neat on the inside.

I'm generally happy with my progress today. I managed to attach all the linings without much unpicking. Apparently before next class we need to have the back skirt slit done as well, so I have a little bit of homework.

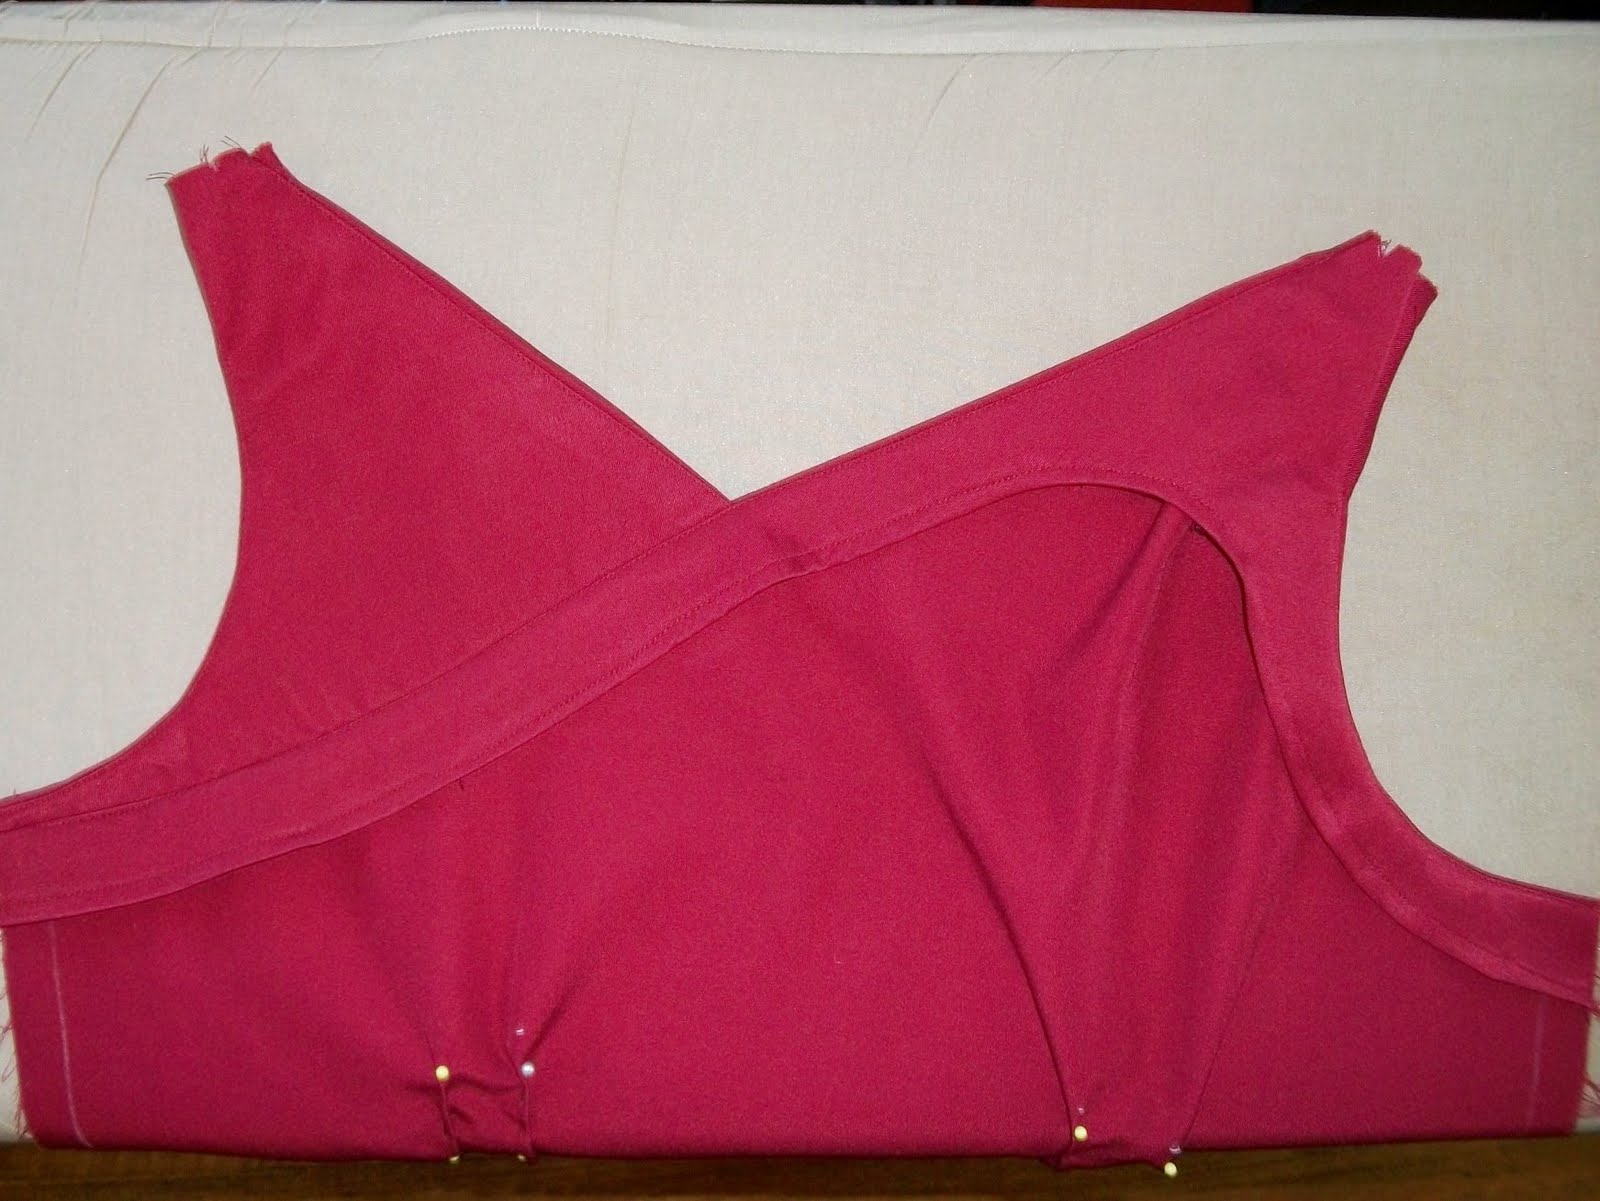
These are the front and back pieces so far. The darts are just pinned at the moment (and those are my tailor's tacks looking all wiggly there)

I'm not happy with how the shoulder gathers are sitting on the front piece, especially the left shoulder (right in the photos). I tried doing a normal gather, but didn't like the uneven result, so decided to just fold a few pleats in. However, I think the angle of the pleats now doesn't match the angle of the neckline and that's making it look a bit wrong. Easy enough fix though as the shoulder pieces are still open. I am really happy with how the lining of the front piece is looking. Nice and clean.


Next Sunday we pin all the pieces together and do a fitting before sewing it up and adding the zipper in the back. I think this is the part I'm most worried about. I have a long history of making beautifully finished garments that fit dreadfully. And I hate that sinking feeling when you pin something together and put it on and realise immediately that it doesn't fit. In my case, it is usually too tight which is so much harder to fix than too loose. And I'm making the sheath dress version of this pattern, which is very fitted. The only alteration I've done so far has been to shorten the waist. I help the pattern piece against me and folded it up until the "waist" line was sitting at my waist. Took at least an inch of the original pattern. Hopefully this means the curves will be in the right places. The pattern has four pairs of vertical darts. I'm hoping that between the side sides, back seam and the eight darts, I should be able to get a good close fit. *fingers crossed*

I'm also apprehensive about zippers. The last time I remember putting a zipper in was my Year 8 sewing class in high school. I remember I got good comments on my zipper, but my brain has long since erased the know-how of zipper insertions. I will be grateful for having some help and advice on hand.

The best thing about today was realising that I haven't forgotten all my sewing know-how and can actually do this. I think it was good to have someone there to provide some guidance like where to start, and demonstrate some techniques and just check that we're doing things in the right order. It's a bit like sewing with a safety-net.

Sunday, September 26, 2010

Late 1940's black jacket

This is one of two gorgeous jackets I picked up at the Love Vintage fair earlier this year. The fabric is a black worsted wool. The collar and cuffs have this lovely pin tuck treatment that makes the jacket this much more distinctive.

Here it is, and pardon the less than enthused expression on my face, I was doing these after faffing about doing the swimsuit shots so was getting tired.
I think the shot from the back best shows just how nipped in the waist is. The construction of the jacket is beautiful. It is a joy to wear such a well tailored garment. As I commented to a friend, it feels a bit like being hugged all day, it fits that snugly around the waist.

And onto the detailed shots for the sewists out there who love to see how things are put together.
The label - mornessa. I haven't been able to uncover much about this label on the internet so I doubt it was a high fashion label. It's made in England so I'm guessing the brand is also British. Next to it is the tag from the stall I bought it from, which gives the rough date and size. And the very reasonable price, considering what I've paid in the past for suit jackets from DJs or similar that have not been any where near as well made.
The lovely pin tuck feature on the collar and the cuffs. It's the same fabric as the rest of the jacket, just with gorgeous rows of pin tucks.

Fabric covered buttons and bound button holes.

The shape of the back and sleeve pieces is interesting. It's a bit tricky to show the seam in the photos, but the centre back piece and the top of the sleeve are all one piece, rather than a separate back piece and set in sleeve. I haven't seem this style of pattern in a jacket before.

Also in the shaping, the nipped in waist is very obvious in the side seam. And even the sleeves have darts in the them to add to the very fitted style. The jacket has two vertical pockets at the front, with a little flap that sits perfectly flat with the jacket.

I *love* this jacket. I've worn it to work a number of times and always get compliments on how beautifully it fits. I'm on the look out for any patterns from that era that are close to this, and particularly have that interesting centre back and sleeve piece as I'm curious as to how that affects the way you construct and fit the garment.

Monday, September 13, 2010

Vintage-inspired Cherry Print Apron

A while ago I was inspired to make a vintage style cherry print apron. It started when I saw this apron in a magazine and also came across some vintage cherry print fabric at a market.
I started looking at pictures on vintage apron patterns to get a feel for what style of apron I would make. These three where the main ones that I ended up used for my pattern shape.


I decided to go with a sweetheart neckline and princess seams down the front, with the shoulder straps being part of the centre bodice piece. The back is the same as vintage patterns above, with a button up the top and ties at the waist. I decided not to go for pockets and not to have a ruffle around the edge.

The pattern process was probably a tad over-engineered, but it had been a little while since I'd drafted something from scratch, so it took a bit for my patterning mojo to kick in. Once I was happy with my muslin of the top half, I drafted the skirt and tie pieces.

The cherry print fabric I had was cotton and quite light weight. I was concerned that with frequent use and washing it would tear easily, so I decided to back it with some white cotton duck I had in my stash.

I cut out the pattern pieces in each fabric and then used the overlocker to sew them to each other and finish the raw edges. I then proceeded with the construction of the apron. As the cherry print isn't as bold as the original source of inspiration, I decided that it needed some trim to make it "pop" a bit. I used red bias tape around the edges and across the waist seam.

For the button closure at the back, I decided to use a fabric covered button. I played around with both a cherry print and plain red fabric button and decided the plain red button looked better. The button hole is bound with red bias tape to match the edging.
And here is the finished product, as modelled on Daphne:

And here it is modelled by yours truly*

*I should note that I am not in fact naked under the apron. I was modelling my newly acquired vintage bathing suit when I realised that I hadn't taken any photos of me in the apron, so I quickly threw it on and took a few shots (I couldn't be bothered getting into a frock). I realised later that it looks like I'm only wearing an apron. Think of it as an apron pin-up if you like :)

Sunday, September 12, 2010

Catch up posts!

I had a lovely day out at another Lindy Charm School for Girls workshop today, this time in Melbourne with the fabulous Ms Belle as my companion in charm. It reminded me that I haven't actually gotten around to doing a number of vintage blog posts! I'd finally gotten around to taking some photos, and have talked about them with friends, but had forgotten to actually post.

So shortly I will post about:
  • The completed cherry print apron (which I wore over my frock tonight while making lamb roast post-charm school)
  • The two gorgeous late 1940's suit jackets I picked up at the Love Vintage Fair earlier this year.
  • The fabulous vintage (1950s?) swimsuit I bought from a friend recently that fits beautifully and has interesting construction.
  • A vintage frock from bought from the same friend as the swimsuit that is lovely, but a little big and I'm debating to alter or not to alter.
Stay tuned.

Sunday, April 25, 2010

A day at the Love Vintage Fair

Last Sunday I went to the Love Vintage Fair with a friend. I've been a few times in previous years and I think each time I have a better time because I know what to expect. I've gotten better at being a more discerning shopper so I'm not sucked in by the prettiness and ignore things like fit, quality, price etc..

I think this year was the best time I've had. It was greatly helped by going with a friend and we'd booked into the Lindy Charm School for Girls workshop in the afternoon, which gave us the morning to browse the stands, then have lunch and do the workshop. I also dressed up, which I haven't done in previous years.
Betty Page pencil dress, black seamed stocking and the black and white patent leather heels I got for my birthday.

The shopping
This year I decided I was not going to buy anything unless it really ticked all the boxes for me. I was fortunate to find three items that fit that criteria. The very first stall we went to I was browsing through some jackets and the shape of one caught my eye. Late 1940s, wasp waist. I tried it on and while the fit was exceptionally good, it was missing a button and the fabric was a black brocade that I felt was a bit "much" for my tastes. As I was putting it back on the hanger, the stall holder mentioned that if the fit was good, I should try the jackets on the rack next to it, as they all came from the same consignment. I had found my 1940s doppelganger! Whoever she was, she had good taste.

I found two jackets that I fell in love with, one black, one grey. First of all, the fit was incredible. The waist of the jacket was perfectly lined up with my waist, instead of being too long in the torso, which is a common problem I have with jackets. The jackets were well constructed and the wasp waist felt like it was hugging my body, rather than straining. They fit well over the bust and hips and the sleeve length was dead on. Both are worsted wool and in excellent condition. I will have to post photos in a follow up post. The price was quite reasonable for the quality. Indeed, I've paid more for a modern suit jacket at DJs and the quality was no where near as good as these vintage jackets.

The other item was a pair of red vintage Nina Ricci sunglasses. I've been after a decent pair of sunglasses for a while now. These caught my eye and I tried them on and first thought they were a bit too bold. However, as I tried on other sunglasses, I kept coming back to them. Talking to the stall holder and my friend, they made me realise that I've been shopping for sunglasses all wrong. I've been leaning towards small delicate frames, which tend to get swamped by the rest of my "look", which is more bold. I tend to wear and lot of black, charcoal and grey and have red hair and wear dark red lipstick, which really needs a bold pair of sunglasses to fit the look. So I bought the red ones. I must admit, I feel very glamorous when I wear them.
The vintage Nina Ricci sunglasses with my hair done from the workshop

The Lindy Charm School for Girls workshop
I saw this on the program and immediately signed up myself and a friend. I first came across the lovely ladies from the Lindy Charm School for Girls at last year's fair when I got them to do my hair in a vintage hairstyle. The workshop was lovely and focused on how to incorporate some vintage glamour and style into our own personal look. It was really nice to see ladies from a wide age range participating. The Lindy Ladies talked us through the various underpinnings that make up vintage styles. We did a lot of work on hairstyles. I finally know how to pin curls and an up sweep. I've read books, web articles, seem YouTube videos, but it seriously doesn't beat having a real person in front of you to tell you that you're turning your hand the wrong way when trying to do an up sweep. The only unfortunate thing was that the Love Vintage website had advertised the workshop as running from 1-3pm, when it was actually running from 1-4pm. My friend had a hockey match to get to across town by 3:45pm, so we had to leave early, which meant we missed out on the section on make-up, but I feel a bit more confident about tackling that so I wasn't too disappointed. The most useful part was the stuff on hair styles. I've already emailed the Lindy Charm School to get some of their nifty products.

One thing the Lindy Ladies impressed upon us was to always tell a lady when you like her "do" or think her frock is fabulous. Those little compliments really do make the difference from feeling just okay to feeling like a million bucks. I got a lot of little compliments over the day at the fair, including plenty from the Cunning Plans Dept afterwards and they really did lift my mood and make me feel gorgeous.

On the whole, a fabulous day out. Watch this space for detailed photos of those jackets when I can get the camera to talk to the computer.

Saturday, April 3, 2010

Ready. Set. Sew!

Fabric and notions at the ready - check
Sewing machine and overlocker just back from service and working smoothly - check
House to myself for the entire Easter long weekend - check

Let the sewing commence!

This Easter the projects are:

1. The vintage-inspired cherry print apron


2. The skirt from Simplicity 4885


And if I have time, perhaps some more wardrobe refashions. Now, where did I put my scissors...

Friday, November 13, 2009

Steampunk and Vintage retail therapy

Aside from 1950's & 1960's vintage stuff, I've also been swept up by the flood of friends who are getting into Steampunk. I have long had a fascination with Victorian era fashion, which I think was strongest when I was a goth many years ago. There is an upcoming steampunk party that we've been invited to and while I've been both drooling and boggling at some of the steampunk costumes out there, I have failed to actually come up with what I'm going to wear. My thoughts so far have been along the aviator line, possibly a bit Sky Captain-ish. Though I think this is really cute.

To give myself a bit of a boost, and to take advantage of the good exchange rate, I decided to indulge in some retail therapy to give my potential costuming efforts a nudge. I bought these patterns from Reconstructing History:

I'm hoping that these will give me a good starting point to get the Victorian shape right. I'm hoping I can modify the riding habit to have a bit of an aviator feel, but with the Victorian silhouette.

And because I couldn't leave my other vintage habit out, I also picked up this:


It is actually quite good. I think my fundamental lack of dexterity and ability to hold my arms up for any length of time may prove to be my downfall, but it is a really nifty book. I finally understand how finger waves and pin curls are done. I'm curious about how well my hair would hold a wet set (which is touted as the strongest set), since my hair is incredibly fine and has trouble even holding a perm (it was a the early 90's and yes it looked ridiculous). Still, I have more of a clue about styling my hair than I did before.

Tonight I'm off to Melbourne, then Tassie, then back to Melbourne. Shopping will include the Melbourne Theatre Company garage sale, various vintage haunts and markets. Not to mention seeing fabulous friends who will no doubt inspire me so that when I come home I'm eager to get stuck in and make stuff.